Shopify is the easiest way to sell things on the internet. It’s easy to use and comes with everything you need to start an online store.
For a small fee, Shopify’s built-in ecommerce technology lets you use the company’s backend, web design, and optimization tools.
It’s a great platform for people who are just starting out because you don’t have to spend time on web development and you can sell anything you want.
With the retail apocalypse getting worse, thousands of business owners are turning to ecommerce and looking for ways to set up digital storefronts.
I’ll show you how to set up your own store in this step-by-step guide. I’ll show you everything you need to do to get your online shop up and running quickly.
By the time you’re done reading, you’ll have set up your own Shopify online store and be ready to sell products to people all over the world.


How to Open Your Own Shopify Store
It’s very easy to set up a Shopify store, and you don’t even need money to get started. Shopify gives you a 14-day free trial to help you get started.
Register with Shopify.
To make an account, go to the Shopify home page and click on the “Start free trial” button.
You don’t need to enter your credit card information because the company gives you a 14-day free trial. You only need to give an email address, pick a password, and name your store.
Wait for the company to process your information after you’re done. To move on to the next step, you must enter some personal information.
Basically, if you want to run the store like a real business, you need to give Shopify your address and contact information so that it can set up your payment currency and sales tax.
After you give all of that information, you’ll be taken to the admin panel of your Shopify dashboard.
Shopify’s Control Panel
Here is a picture of the main part of the Shopify dashboard.
As you can see, there are a number of tabs on the left that you can click on. Here’s a short list of what they have to offer.
- Home: Here, you can see what’s going on with your Shopify store as a whole.
- Order: This is where your first order will be shown. The same will be used to keep track of and handle orders that are coming up.
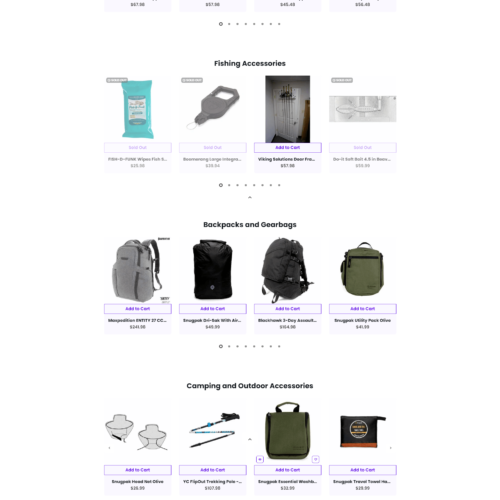
- Products: This is where you can add and manage your items, set up gift cards and more.
- Customers: In this section, you can manage information about your customers, such as their sales volume, personal information, past orders, and more.
- Analytics: Open Shopify analytics when you want to make sales reports.
- Apps: This is where you can add different Shopify apps to your store to make it work better.
- Online Store: The place where you can find all of your store’s settings, such as checkout settings, personal information, shipping, taxes, and more.
In addition to these tabs, you can find more options by clicking on the “Settings” tab in the bottom left corner.
You can change the name of your store, your information, the time zone, the currency, and more in the “General” section.
“Shipping” is the next thing you should look at. You can change your shipping zones and rates here. If you pay for a Shopify plan, you can also use your UPS, FedEx, and other shipping accounts to figure out shipping rates.
Before your website goes live, you don’t have to worry about the other options.
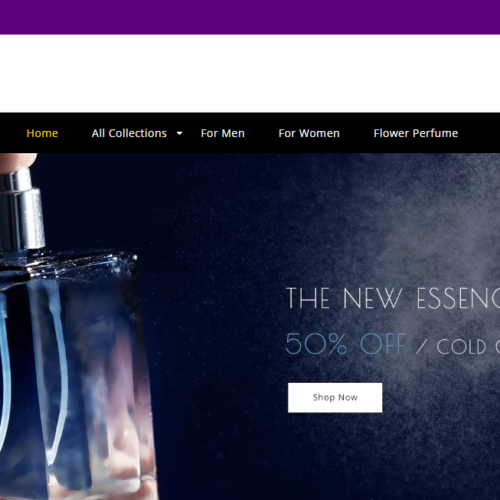
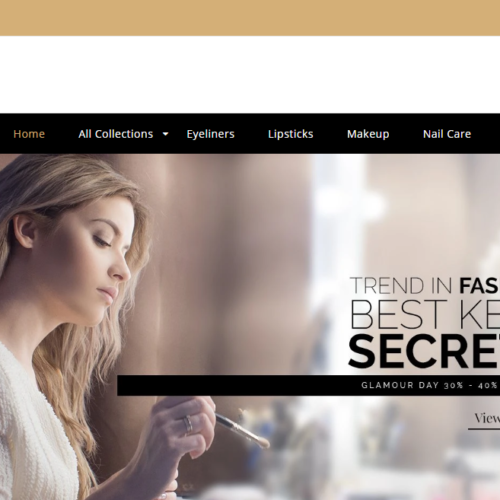
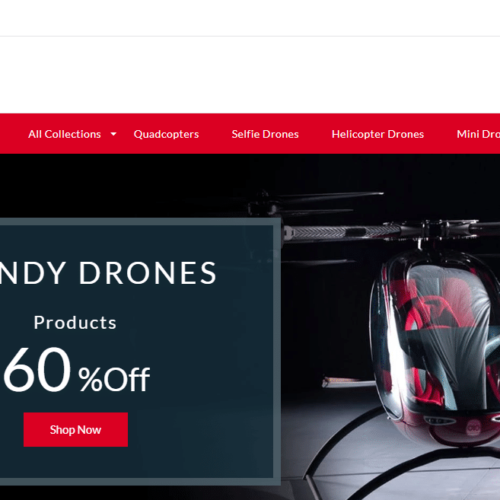
Pick a Shopify theme.
Your Shopify store was built with a default, or “debut,” theme, just like any other website. The theme for the first show can be changed in two ways:
- You can replace the current theme with a new one.
- You can change the debut theme so that it better fits your business and its goals.
Click the “Customize Theme” button on your homepage to get started.
Changing the layout of a website is usually part of customizing an existing theme. In simple terms, it is the improvement of layouts that have already been made. The drag-and-drop theme editor on Shopify makes it easy to make changes quickly.
I think you should stick to that instead of making big changes to the design (especially if you don’t know how to code).
If you don’t like how a theme looks, just choose another one instead of changing the whole thing.
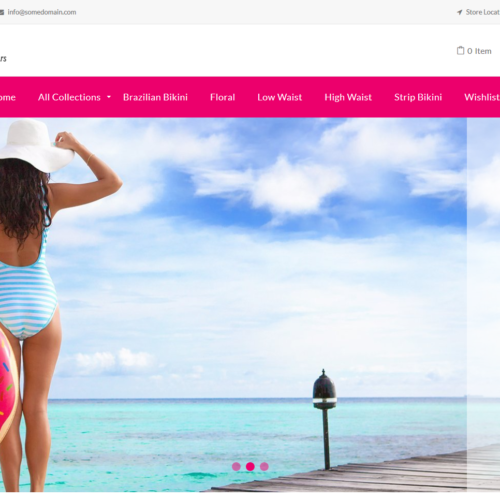
Go back to the homepage, click “Customize Theme,” and then click “Explore Free Themes” in the Themes section of your dashboard to see an overview of the themes.
Look at each theme and choose the one you like best. You’ll also have a choice of different layouts for each of these themes.
Once you’ve added a new theme, it should show up under the default theme in the Themes section.
Your store now has your new theme. Click the “Actions” button below the new layout and then click “Publish” to make it work.
All done. You’ve changed the look of your store and done it well.
Next, let’s look at how to add a domain to your Shopify website.
Put items in your store.
In the Shopify admin area, you can add a product to your store by clicking “add product” in the middle of the screen or “products” in the left-hand navigation bar.
You can upload a.csv file to your product catalog if you don’t want to add products one by one. Follow the structure that Shopify suggests to avoid import errors.
We’ll add products by hand in this guide. Just click the “add product” button, and you’re ready to write the description.
Enter the item’s name in the “Title” field and its description in the “Description” field. Google will also pick up on these, so give them some thought.
Then, enter the information about the seller, the type of product, and the collection that the item is part of.
Tip: Always group your items together into collections. People will find it easier to find the product line they want this way.
The next step is to add tags that are relevant and good images of the products. Each photo will show up at its normal size, but if you move your mouse over a certain part, it will be highlighted. This is the same way it works on Amazon and other stores.
So, if you want to show how visually appealing your product is, you should always use high-resolution images.
You can add as many items as you’d like. Just make sure to save each one at the end.
Choosing a price for your goods
When it comes to pricing, you will have access to the following three fields:
- Price
- Compare at price
- Price per unit
If you want to show your visitors that an item is on sale, you need to fill out the second field. The price shown is the original price before the discount, and the price field shows how much it can be bought for.
Leave the compare at price field blank if you don’t want to link the item to a sale.
You also have the option of keeping track of your inventory. This tells Shopify you want it to keep track of your stock.
To do this, choose “Shopify tracks this product’s inventory” and set the number of items that can be bought.
This means that if you sell 20 t-shirts, Shopify will show the item as “out of stock” and stop you from taking any more orders until this number is changed.
If you know the product’s stock-keeping unit (SKU), enter it in the SKU field.
For people who don’t know what SKUs are, they are internal identifiers that make it easier to find products. I think you should put a standard SKU number in for each item from the start.
Click “Save product” at the bottom right of the screen when you’re done. The product should then show up in the overview section.
You just added your first item to your Shopify store, so congrats! Now, let’s make sure that your website’s design and theme as a whole look friendly.
Choosing a Domain Name for Your Store
Set up a domain to make your store official after you’ve added a product and chosen a theme.
To do this, go back to the main dashboard and click “add domain” to open the Domain section.
Shopify gives you three different ways to add a domain name:
- Connect existing domain
- Transfer domain
- Buy new domain
By default, “yourstore.myshopify.com” is the URL for a Shopify domain name. If you buy a new domain from Shopify, you can change this to a proper domain like www.yourstore.com. The price is $14 per year.
If you’ve already bought a domain from a web host like Bluehost, you can just connect it to Shopify to use it as the web address for your online store.
You can also move a domain from another service provider to Shopify. I think you should do this if you only want to pay one company at the end of the month.
You’ve done a great job adding a domain to your Shopify store.
Setting up payments is the last step. After that, you can open your store to the public and start selling things to people all over the world.
How to Set Up Payments on Shopify
Go to the Settings page of your Shopify store to receive money in your business bank account or turn on a different payment processor. Now, click “Payment providers” to set up the account where you want your money to go.
Shopify supports a number of different ways to pay, but by default, PayPal Express and Shopify Payments are set up. Both of these charge their usual sales fee.
You’ll need to set up a merchant account to use PayPal. You can do this by logging into your personal PayPal account and finding the option to upgrade to a merchant account.
No matter what payment method you choose, Shopify will sync your customers’ payments with their orders. This way, if you use the native payment configuration, you can keep track of what has been bought, by whom, and how, all without leaving Shopify.
Also, you can use faster payment methods like Apple Pay. These make it easy for potential customers to check out, which improves their experience and helps you make more sales.
Awesome! You’ve just opened a shop.
That’s pretty much it. You are now ready to let everyone know about your new store. The last step is to pick a Shopify plan that costs money.
You can use most of the platform’s features during the free trial, but you can’t sell anything until you become a paid subscriber.
So choose a Shopify plan that fits your budget and business needs.
For example, if you just want your store to do basic things, you can start with the $29/month plan. This is a good choice for people who are selling their first home. You have to pay for the $79/month plan if you want to use advanced features like cart recovery.
You don’t have to worry because Shopify lets you upgrade. This means that as your business grows, you can add more features to your website to keep up with it.
Service Done for You on Shopify
You might not have enough time to make a store. You might not think you know how to do it. Not a problem!
I went out and found the best Shopify developers who can build you a store on a budget. Setting up a store can cost up to $10,000 or more. The 3 experts below can do it for a small fraction of that.
Why you should use Shopify
- It lets you add a custom domain (like franklinhatchett.com), hosts the website for you, and takes care of the complicated back end.
- It keeps track of, processes, and handles all of your orders and payments, so you can focus on building your brand.
- It comes with a long list of apps that let you add reviews of products, make loyalty programs, and do other things.

What are the bad things about Shopify?
Fair enough, Shopify doesn’t let you control the backend (website code, hosting, etc.), so if you’ve been building websites from scratch, it may feel a bit limiting.
You could also make a website with WordPress and add the WooCommerce plugin. But if you want an easy, simple, and trouble-free way to do it, choose Shopify.
Personally, I think it’s a good idea to let Shopify handle your backend. They are a big company, and a Shopify store is less likely to be hacked than a WordPress website.
Overall, Shopify has a lot to offer a person who wants to open their own store.
Shopify is perfect for you if you want to sell popcorn, designer handbags, or skates.